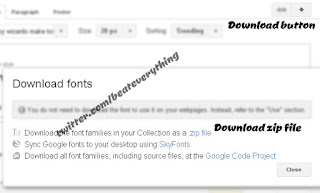
After visiting Google Fonts you'll see fonts as shown in picture below.
Just decide which font you want to use and click on Add to Collection. You can add multiple fonts to collection. When you add any font to collection a list of fonts to your collection will appear at bottom.
Now download all fonts in your collection by clicking the download button at top right side.
On clicking this button a new box will pop-up giving you some options as shown in above picture. Now from there download the font families in your collection as a .zip file and extract that zip file to obtain font files. You can use 7zip to extract this zip file. You can also download all font families at Google code if you want.
Now how to install fonts?
Installing fonts in Windows 7 or 8
Easiest way to install font is to double click on font file to get its preview and then click on install button from there.
Alternatively you can right click on a font file and then move your cursor to install and click on it. You can also use Fonts Control Panel to install fonts but easy ways are better.
Installing fonts in windows Vista
Simply right click on font file and click on install. You can also use Fonts Control Panel. But install button is not available in font preview window. Windows 7 got this install button in font preview window.
What if you are using Windows XP?
- If you are using windows XP then you have to use Fonts Control Panel to install fonts.
- Click on Start menu and then click on control panel.
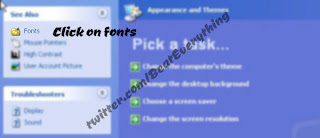
- Click on Appearance and Themes category.
- Select fonts from See Also section that is on left side of screen.
- If you are using classic view then simply double click on fonts after opening control panel.
- Click on file menu and then on Install New Font...
- Now move to folder where you extracted your downloaded fonts.
- Click on font family you want to install and press OK. If you want to install multiple font families then hold down CTRL and click on fonts you want to install.
- You can also drag and drop fonts there.
I hope this helped. If you liked this then share with your friends.


